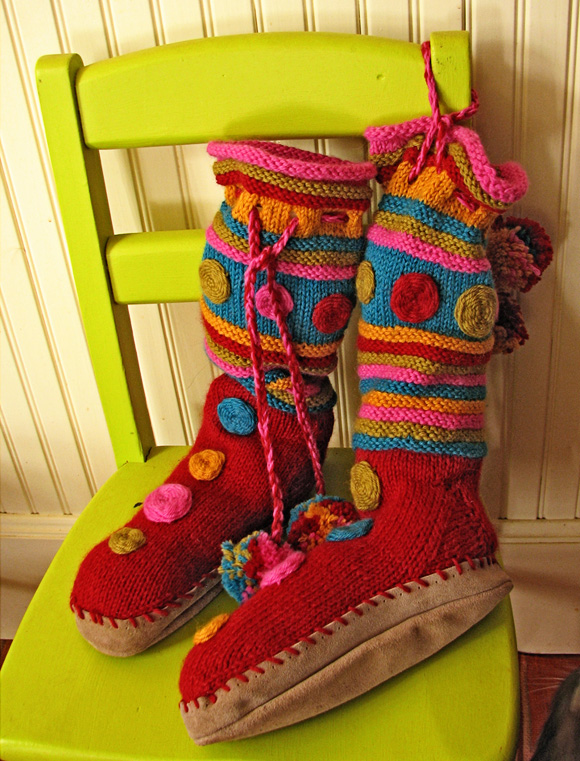
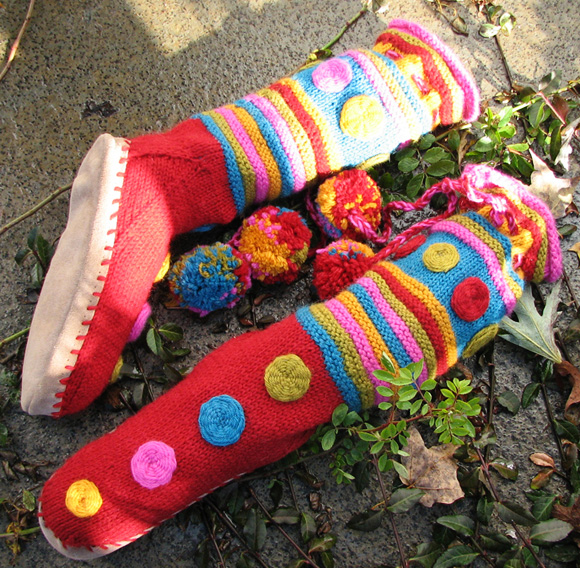
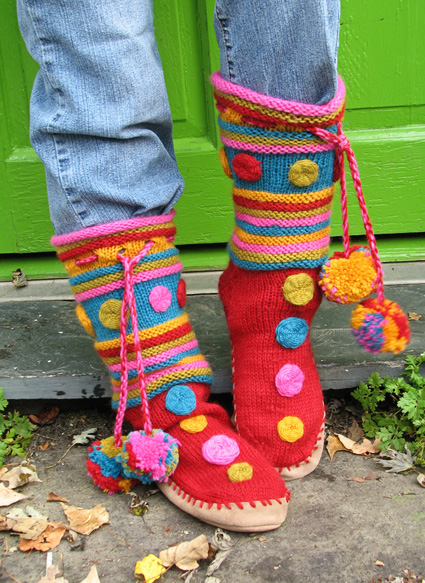
The leg of this sock is worked using a larger needle, for a slouchy fit.
When slipping sts, slip st purlwise with yarn held to WS of work.
skp: Sl 1 knitwise with yarn held to back of work, k1, pass slipped st over st just knit. 1 st decreased.
Ridge: K 1 round. P 2 rounds.
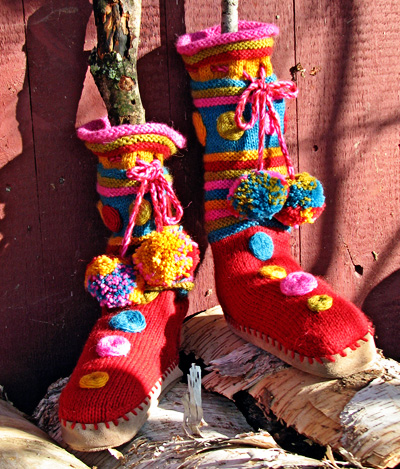  LEG LEG
Using larger needles and A, CO 44[48, 52] sts. K 1 row, then divide sts between 3 needles and join to begin working in the round, being careful not to twist.
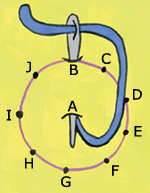
K 6 rounds. Place safety pin or split ring marker in work to indicate beginning of round.
Note: Directions for Ridge can be found in Pattern Notes [above]. When beginning with a new color, break the old color and join the new color, leaving tails of each to be woven in later.
Work one Ridge using B, then one Ridge using C.
Sizes S, L Only:
Next Round: Using D, [k9[-, 11], k2tog] four times. 40[-, 48] sts.
All Sizes:
K 2[3, 2] rounds using D.
Next Round: [K1, yo, k2tog, k1] to end. This round forms eyelets for crocheted cord.
K 2[3, 2] rounds.
Sizes S, L Only:
Next Round: Using D, [k10[-, 12], m1] four times. 44[-, 52] sts.
All Sizes:
Work one Ridge each in colors E, A and B.
K 15 rounds using E.
Note: As written, leg is 10.5 inches long to top of heel. If you wish to lengthen or shorten leg by 0.5 inch or less, work more or fewer rounds in this section. If you wish to change length by more than 0.5 inch, add or omit Ridges in the following section. Note that if you add Ridges, you may require more yarn.
Work nine more ridges, in the following color sequence: D, C, B, A, E, D, A, B, E.
 FOOT FOOT
Switching to smaller needles, k 3 rounds using C. Foot will be worked entirely using C.
Next Round: [K9[10, 11], k2tog] four times. 40[44, 48] sts.
K 2 rounds.HEEL FLAP
K first 20[22, 24] sts of next round onto one needle. Heel flap will be worked back and forth over these sts; remaining sts are held on other needles for instep.
Row 1 [WS]: K1, p to last st, k1.
Row 2 [RS]: K2, [sl 1, k1] to end.
Repeat these 2 rows until flap measures 2[2.25, 2.5] inches, ending with a RS row.
TURN HEEL
Row 1 [WS]: P12[13, 14], p2tog, p1. turn work.
Row 2 [RS]: Sl 1, k5, skp, k1. Turn work.
Row 3 [WS]: Sl 1, p6, p2tog, p1. Turn work.
Row 4 [RS]: Sl 1, k7, skp, k1. Turn work.
Row 5 [WS]: Sl 1, p8, p2tog, p1. Turn work.
Row 6 [RS]: Sl 1, k9, skp, k1. Turn work.
Row 7 [WS]: Sl 1, p10, p2tog, p0[1, 1]. Turn work.
Sizes S, M Only:
Row 8 [RS]: Sl 1, k10[11, -], skp, k0[1, -]. 12[14, -] sts remain. Proceed to Gusset.
Size L Only:
Row 8 [RS]: Sl 1, k11, skp, k1. Turn work.
Row 9 [WS]: Sl 1, p12, p2tog. Turn work.
Row 10 [RS]: Sl 1, k12, skp. 14 sts remain. Proceed to Gusset.
 GUSSET GUSSET
Place all sts of instep on one needle. Using needle holding heel flap sts (Needle 1), pick up and k 12[13, 14] sts along adjacent edge of heel flap. Using a second needle (Needle 2), k all sts of instep. Using third needle (Needle 3), pick up and k 12[13, 14] sts along remaining edge of heel flap, then k first 6[7, 7] sts of heel flap. This point (center of heel) will now be beginning of round; place safety pin or split ring marker in work if desired. 56[62, 66] sts: 18[20, 21] sts each on Needles 1 and 3, 20[22, 24] sts on Needle 2.Gusset Decrease Round: K to last 3 sts of Needle 1, k2tog, k1; k all sts of Needle 2; k1, skp, k to end of Needle 3.
K 1 round.
Repeat these 2 rounds 7[8, 8] times more. 40[44, 48] sts: 10[11, 12] sts each on Needles 1 and 3, 20[22, 24] sts on Needle 2.
FOOT
Work in stockinette st until foot measures 2 inches less than desired length to end of toe.
TOE
Toe Decrease Round: K to last 3 sts of Needle 1, k2tog, k1; k1, skp, k to last 3 sts of Needle 2, k2tog, k1; k1, skp, k to end of Needle 3.
K 1 round.
Repeat these 2 rounds five times more, then work Toe Decrease Round once more. 12[16, 20] sts.
K to end of Needle 1, then place all sts from Needle 3 onto Needle 1. 6[8, 10] sts each on Needles 1 and 2. Graft sts on Needle 1 to sts on Needle 2. |
|

Hiç yorum yok:
Yorum Gönder